
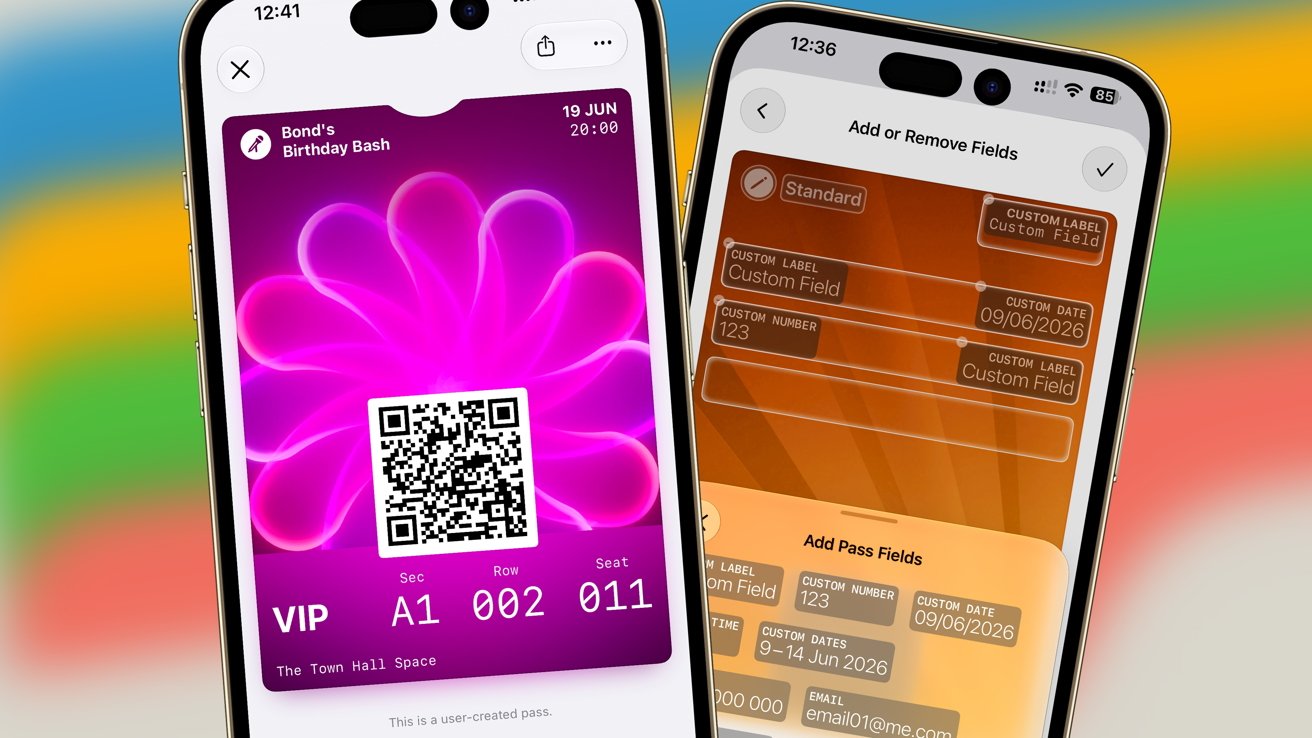
The Wallet app in iOS 27 lets you make your own digital passes from all those membership bar codes you have. It takes a little work, but it already works well.
The Wallet app has been used to hold more than just your credit and debit cards for years. Membership cards and digital passes have been a staple of the iPhone app for quite some time.
However, to add a pass to the Wallet, you had to do so in one of two ways. The easiest is to use an app for a service and select the option to add a card or digital pass to the Wallet.
This meant you couldn't easily add passes for things that didn't have an app. For example, if you were going to a concert that didn't have an app-based ticket component, you had to use an offline version.
The alternative was to use a third-party app that acted as an intermediary. They would let you insert the details of the offline pass, then generate a custom digital version that the Wallet accepted.
For iOS 27, Apple sherlocked those apps by adding a similar feature to Wallet.
If you tap the plus symbol at the top of the main Wallet screen, you'll find a new Create a Pass option under Add to Wallet. It's subtitled "Tickets, membership cards and more."
Tapping it brings up a page explaining that you can create a pass, either using Visual Intelligence or doing so manually.
The basic flow of making a custom pass in Wallet for iOS 27
The process to make a manual pass isn't too taxing, but it does require you to have all of the needed information. Since you'd have the pass on you, this is a fairly trivial element.
The manual pass process starts with three pass templates. The Membership template is a layout that is intended for access passes, such as to your gym or workplace, complete with things like Member Status and a membership number.
Event is geared toward concerts and theater visits, including items like Admission Type and seat details. Lastly, Standard is a generic option with some ready-made fields to enter that don't have titles.
All three passes also have a section for a barcode or QR code, which most offline passes of this type will have.
Using the templates to make a pass in the iOS 27 Wallet.
In the template, you can tap each field to change the contents. You can adjust the title of a field and its data, with elements such as date selectors coming up as necessary.
If the fields don't really line up with what you need, the bottom right has an Add/Remove Fields button, which will let you tap the X on each field to remove them. Tap the now-empty boxes to see what new premade fields could go in there instead.
The large square in the middle is labeled Add Code when empty. If you tap it, you are greeted by a view of the camera, and the first barcode or QR code it sees will be added to the box.
It's not fussy about what code it uses either, since it just copies what it scanned and places it in the box. It doesn't check what it's for either, as I discovered by using a barcode for a box of ibuprofen.
You don't need to worry about lining up the barcode with an on-screen box, as it's entering the code automatically. However, this does mean you will need to be careful what scannable codes are nearby, otherwise you may get the wrong one.
The bottom right gives you options to change the way the pass looks. There's a small selection of colors available, as well as some premade background graphics if you want something less plain.
This is nice to have, as you can easily differentiate between your homemade passes. It is a little bit limiting, though.
You have limited options for the color and imagery of custom passes.
At the moment, you can choose from twelve background colors. However, that is really six colors and a row of greyscale options.
The library options are also inoffensive, consisting of seven light trail-based designs. But again, you cannot change the colors of these, and there are so few options.
It's not hard to imagine Apple opening up the feature to allow for more customization of the pass. More colors would work, or even allowing users to select an image from Photos to use instead.
This last bit could be very appealing for concert-goers, if they can slap an image of their favorite singer onto the pass.
If you don't want to do it yourself, the automated process is quite straightforward. It nets you a fairly simple pass with all of the essential elements.
After hitting Continue in the Create a Pass flow, the camera will open up so you can take a photograph of your intended card and barcode or QR code. If you already have an image, there's a button to open your camera roll to use that instead.